Out of paper
Try the following solutions:
•
Solution 1: Make sure the paper tray is not empty
•
Solution 2: Check the rear door of the printer
•
Solution 3: Check the paper
•
Solution 4: Use the HP Paper Feed Cleaning Kit
•
Solution 5: Clean the rollers
•
Solution 6: Contact HP support for service
Solution 1: Make sure the paper tray is not empty
Solution:
If the paper tray is empty, add more paper.
Cause:
The paper tray was empty.
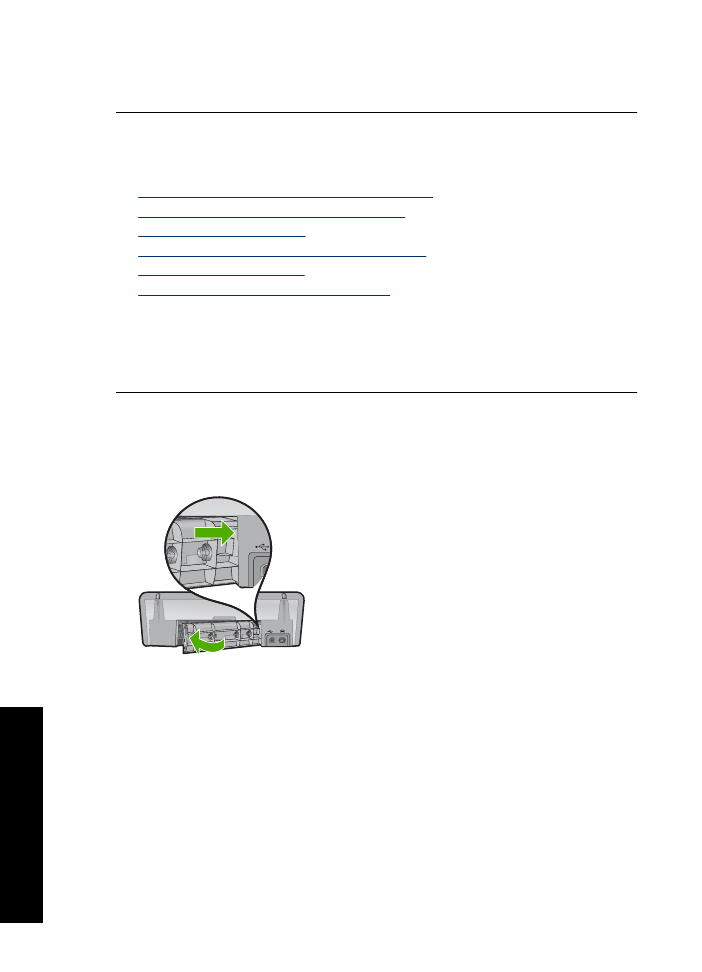
Solution 2: Check the rear door of the printer
Solution:
If you removed the rear door to clear a paper jam, replace it. Gently push
the door forward until it snaps into place.
Cause:
The rear door was removed from the product.
If this did not solve the issue, try the next solution.
Solution 3: Check the paper
Solution:
Check the paper loaded in the paper tray and the print settings.
To check the paper in the paper tray
1.
While the product is on, remove the power cord from the back of the product.
2.
Wait 30 seconds, and then plug the power cord into the back of the product.
Chapter 11
86
Troubleshooting
T
roub
les
hoot
ing
3.
If the product is not already on, turn it on by pressing the
Power
button.
4.
Remove the stack of paper from the paper tray and verify that all the paper in the
paper tray is the same size and type.
5.
Replace any paper that is ripped, dusty, wrinkled, or bent.
If the paper is curled, uncurl the paper by gently bending it in the opposite direction
of the curl or replace the paper.
NOTE:
Use plain paper in the product until the issue is resolved.
6.
Tap the stack of paper on a flat surface to align the edges.
7.
Verify that the stack of paper contains between 10 and 25 sheets of paper.
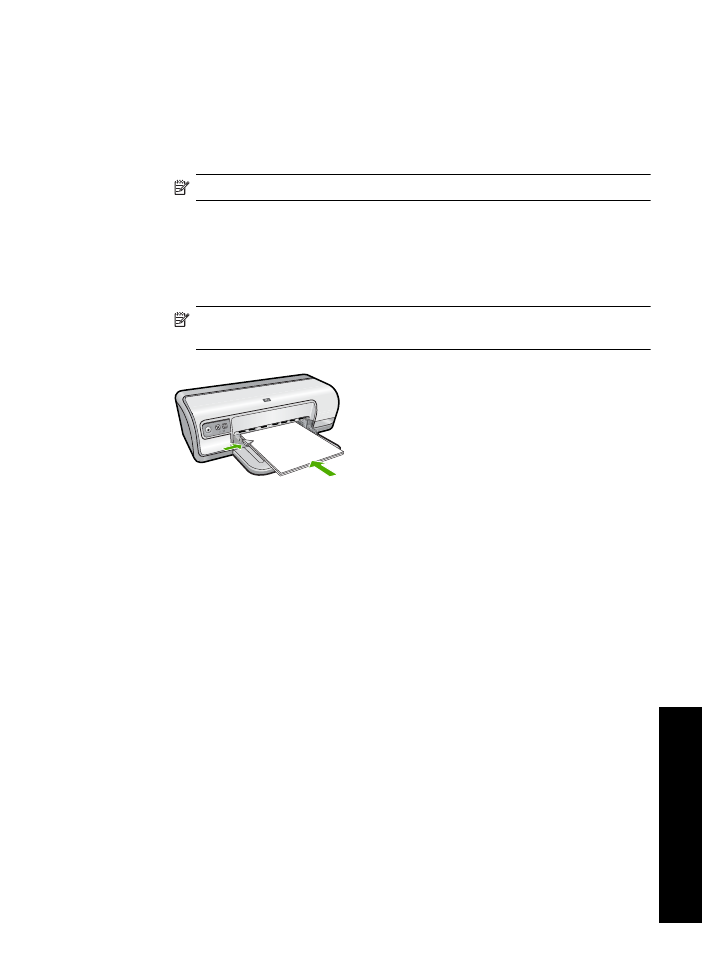
8.
Insert the stack of paper into the paper tray with the short edge towards the printer
and the print side down. Slide the stack of paper towards the printer until it stops.
9.
Slide the paper-width inward until it stops at the edge of the paper.
NOTE:
Do not overload in the paper tray. Make sure the stack of paper fits
within the paper tray and is no higher than the top of the paper-width guide.
10.
Make sure the print settings, paper size and type, match the paper loaded in the
paper tray.
See the following tasks for information about checking and changing these
settings.
11.
Try to print again.
To set the paper size
1.
Make sure you have paper loaded in the input tray.
2.
On the
File
menu in your software application, click
.
3.
Make sure you have selected the correct printer.
4.
Click the button that opens the
Printer Properties
dialog box.
Depending on your software application, this button might be called
Properties
,
Options
,
Printer Setup
,
Printer
, or
Preferences
.
5.
Click the
Features
tab.
6.
In the
Resizing Options
area, click the appropriate paper size from the
Size
list.
The following table lists the suggested paper size settings for the different types
of paper you can load in the input tray. Make sure to look at the long list of choices
Paper problems
87
Trou
bles
ho
ot
ing
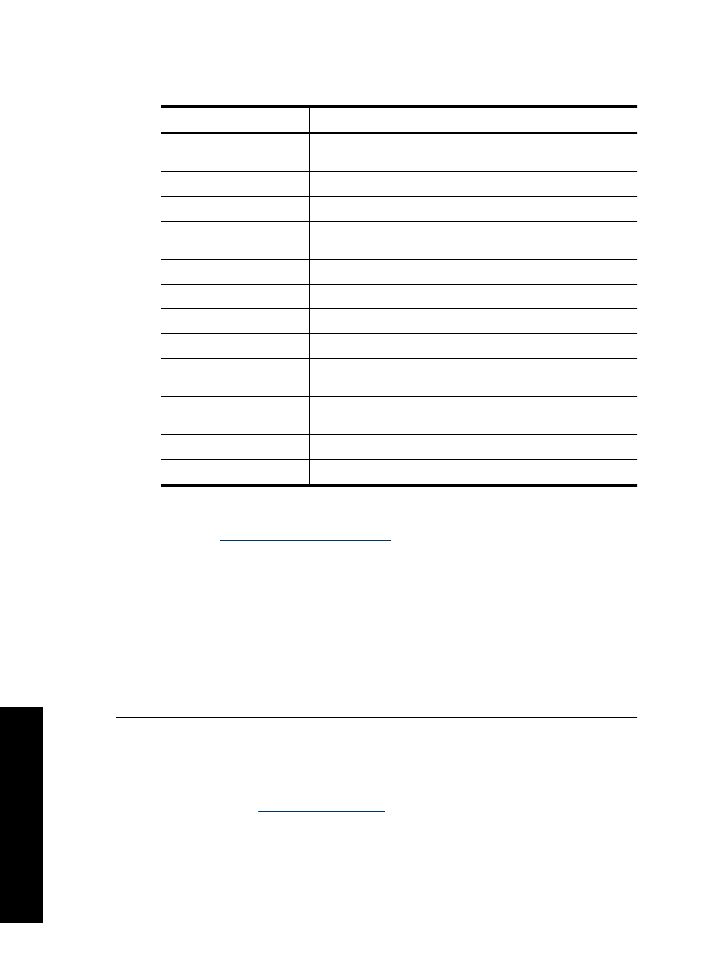
in the
Size
list to see if a defined paper size already exists for the type of paper
you are using.
Paper type
Suggested paper size settings
Copier, multi-purpose, or
plain papers
Letter or A4
Envelopes
Appropriate listed envelope size
Greeting-card papers
Letter or A4
Index cards
Appropriate listed card size (if listed sizes are not
appropriate, you can specify a custom paper size)
Inkjet papers
Letter or A4
Iron-on T-shirt transfers
Letter or A
Labels
Letter or A4
Letterhead
Letter or A4
Panorama photo paper
Appropriate listed panorama size (if listed sizes are not
appropriate, you can specify a custom paper size)
Photo papers
10 x 15 cm. (with tab), 4 x 6 in. (with tab), letter, A4, or
appropriate listed size
Transparency films
Letter or A4
Custom-size papers
Custom paper size
To select a specific paper type
1.
Open the
Printer Properties dialog box
.
2.
Click the
Features
tab.
3.
Click
More
in the
Paper Type
drop-down list, and then select the paper type that
you want to use.
4.
Click
OK
.
5.
Select any other print settings that you want, and then click
OK
.
Cause:
There was a problem with the paper loaded in the paper tray, or the print
settings did not match.
If this did not solve the issue, try the next solution.
Solution 4: Use the HP Paper Feed Cleaning Kit
Solution:
Some Deskjet products require a special kit, called the HP Paper Feed
Cleaning Kit, to clean the paper feed rollers and resolve this issue. To see if this affects
your product, go to:
www.hp.com/support
.
Search for "HP Paper Feed Cleaning Kit" for more information about this kit and to
check whether it is required for your product.
Cause:
The paper feed rollers were dirty and needed to be cleaned with the HP
Paper Feed Cleaning Kit.
Chapter 11
88
Troubleshooting
T
roub
les
hoot
ing
If this did not solve the issue, try the next solution.
Solution 5: Clean the rollers
Solution:
Clean the rollers.
Make sure you have the following materials available:
•
Lint-free cloth, or any soft material that will not come apart or leave fibers.
•
Distilled, filtered, or bottled water.
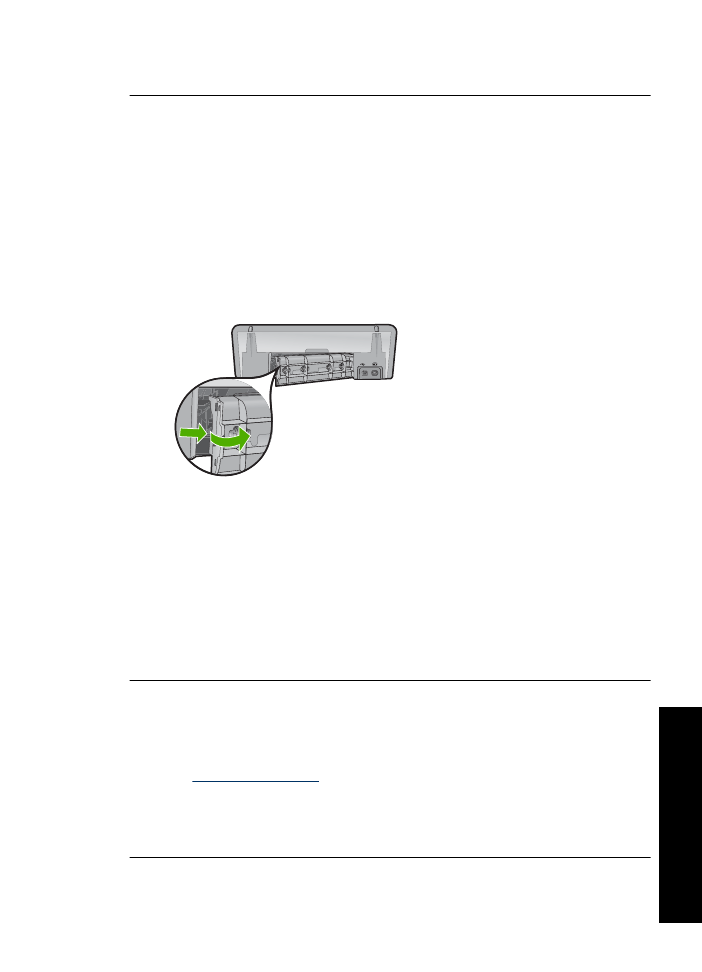
To clean the rollers
1.
Turn off the product and remove the power cord.
2.
Remove the rear door to access the rollers.
3.
Dip the lint-free cloth into the purified or distilled water, and squeeze any excess
water from it.
4.
Clean the rubber rollers to remove any dust or dirt buildup.
5.
Replace the rear door. Gently push the door forward until it snaps into place.
6.
Plug the power cord back in, and turn on the product.
7.
Try to print again.
Cause:
The rollers were dirty and needed to be cleaned.
If this did not solve the issue, try the next solution.
Solution 6: Contact HP support for service
Solution:
If you have completed all of the steps provided in the previous solutions,
contact HP support for service.
Go to:
www.hp.com/support
.
If prompted, choose your country/region, and then click
Contact HP
for information
on calling for technical support.
Cause:
Your product needs servicing.
Paper problems
89
Trou
bles
ho
ot
ing